IMDF Export
This method requires PowerShell 7+ and knowledge of Microsoft Places PowerShell commands.
The IMDF export provides full control over building, floor, room, and desk configuration in Microsoft Places. This method supports pre-existing Exchange resources and provides precise control over the IMDF output.
The Automated Sync is an alternative method that does not require PowerShell. See the method comparison for help choosing.
Before starting, complete the Mapping Requirements checklist to ensure the map is prepared correctly.
Prerequisites
- PowerShell 7+ — Lower versions will produce errors.
- Exchange Admin role with TenantPlacesManagement permissions.
1. Install PowerShell 7+
Windows — install via winget:
winget install --id Microsoft.PowerShell --source winget
macOS — install via Homebrew:
brew install powershell
2. Run the Microsoft Places Install Script
Windows — Right-click PowerShell 7 in the Start menu and select Run as Administrator.
macOS — Open a terminal and run pwsh.
Execute the following commands:
Install-Script -Name DeployPlaces
DeployPlaces
3. Create Building and Floors
Download the existing CSV file containing buildings and floors:
Connect-MicrosoftPlaces
Initialize-Places
These commands prompt with the following options — choose option #1:
1. Export suggested mapping CSV of rooms to buildings/floors.
2. Import mapping CSV to automatically create buildings/floors and room mappings.
3. Export PowerShell script with commands to manually create buildings/floors and room mappings based on an imported CSV.
If no buildings have been configured, the CSV file will contain headings only. Use Notepad or Excel to edit the CSV. If using Excel, save as CSV format, not as an Excel spreadsheet.
Delete all headings/columns except for InferredBuildingName, InferredFloorName, and PrimarySmtpAddress. Populate with building information. Places prefixes each floor name with Floor (e.g., 1 appears as Floor 1).
InferredBuildingName,InferredFloorName,PrimarySmtpAddress
Corporate Headquarters,1,
Corporate Headquarters,2,
Corporate Headquarters,Basement,
Re-run the commands and choose option #2 to import the modified CSV:
Connect-MicrosoftPlaces
Initialize-Places
Set Floor Sort Order
The floor sort order in Places must match the floor elevation in Mappedin Maker. To view the elevation, open Mappedin Maker and choose Edit Floors.
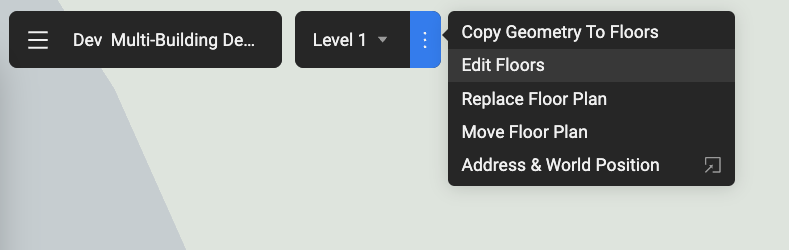
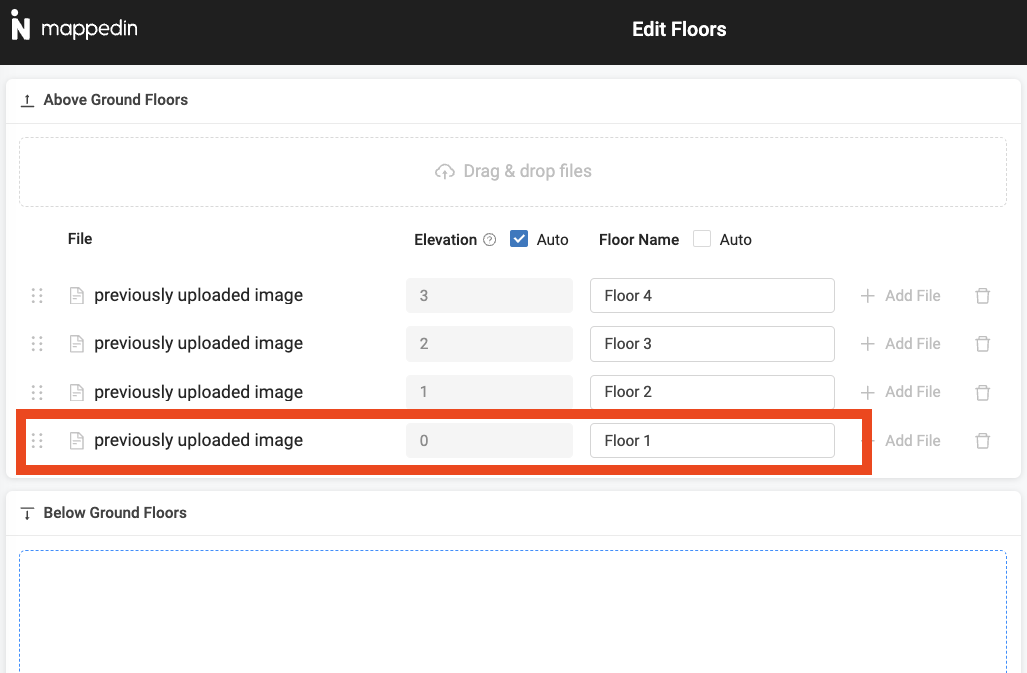
The ground floor is set to 0, floors above ground to positive integers, and floors below ground to negative integers.
Locate each floor's identity:
Get-Placev3 -Type Floor
Set the sort order for each floor using its identity and corresponding Mappedin elevation:
Set-Placev3 -Identity <FLOOR_IDENTITY> -SortOrder 0
4. Create Rooms
Create room resources in Microsoft Exchange Admin.
Each Exchange room name must exactly match a Mappedin location name, including capitalization. Rooms without a match will not appear on the map. See the Mapping Requirements for naming rules.
Use Get-PlaceV3 to check if rooms have synced from Exchange, then assign each room to the correct floor using Set-PlaceV3:
Set-PlaceV3 -Identity room@yourDomain.com -ParentId <YOUR_FLOOR_ID>
Use Get-Placev3 -Type Floor to get floor identifiers.
Room resources may take up to 24 hours to propagate from Exchange to Places. The map must be re-uploaded after propagation completes.
5. Create Desk Pools
Desk pools (also called workspaces) are clusters of desks that users can reserve.
Each desk pool name must exactly match a Mappedin object name, including capitalization. Desk pools without a match will not appear on the map. See the Mapping Requirements for naming rules.
The following commands require the Exchange Admin role. In this example, 1005 is used as the desk pool name.
Connect to Exchange:
Connect-ExchangeOnline
Create a mailbox for the Desk Pool:
New-Mailbox -Room -Alias 1005 -Name 1005 | Set-Mailbox -Type Workspace
Set the timezone:
Set-MailboxCalendarConfiguration -Identity 1005 -WorkingHoursTimeZone "Eastern Standard Time" -WorkingHoursStartTime 09:00:00
Set the reservation rule:
Set-CalendarProcessing -Identity 1005 -EnforceCapacity $True -AllowConflicts $True
Connect to Microsoft Places and assign the desk pool to a floor:
Connect-MicrosoftPlaces

$building = Get-PlaceV3 -Type Building | Where-Object -Property DisplayName -eq "YOUR_BUILDING_NAME"

$floor = Get-PlaceV3 -AncestorId $building.PlaceId | Where-Object -Property DisplayName -eq "YOUR_FLOOR_NAME"

$section = Get-PlaceV3 -Type Section -AncestorId $floor.PlaceId | Where-Object -Property DisplayName -eq "YOUR_SECTION_NAME"

Set-Placev3 -Identity 1005 -Capacity 10 -Label "1005" -ParentId $section.PlaceId
Desk pool changes may take 24 to 48 hours to propagate.
6. Export and Upload the Map
If rooms or desk pools were recently created or updated, wait up to 48 hours for propagation before exporting. If the export completes before propagation finishes, re-upload the map afterward.
Connect to Microsoft Places and find the building ID:
Connect-MicrosoftPlaces
Get-PlaceV3 -Type Building | ft DisplayName,PlaceId
Export a CSV of building resources (adjust the file path):
Get-PlaceV3 -AncestorId <YOUR_BUILDING_ID> | export-csv "C:\path\to\save\csv\assets.csv"
Download the IMDF from Mappedin Maker:
Open Mappedin Maker and select the map. From the Integrations Menu, choose Sync map to Microsoft Places.
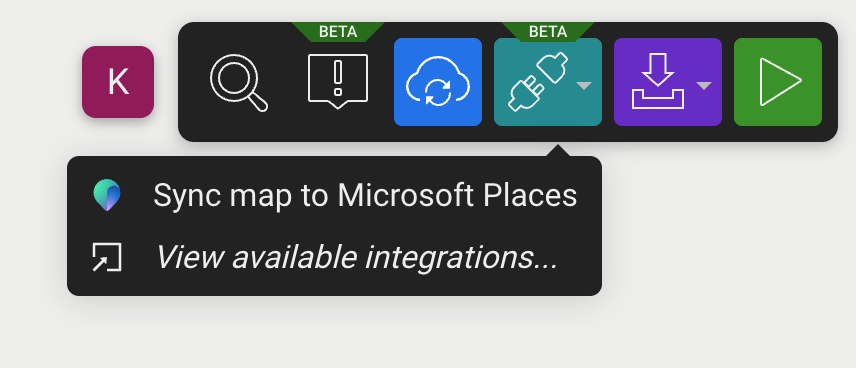
Click the Download IMDF button.
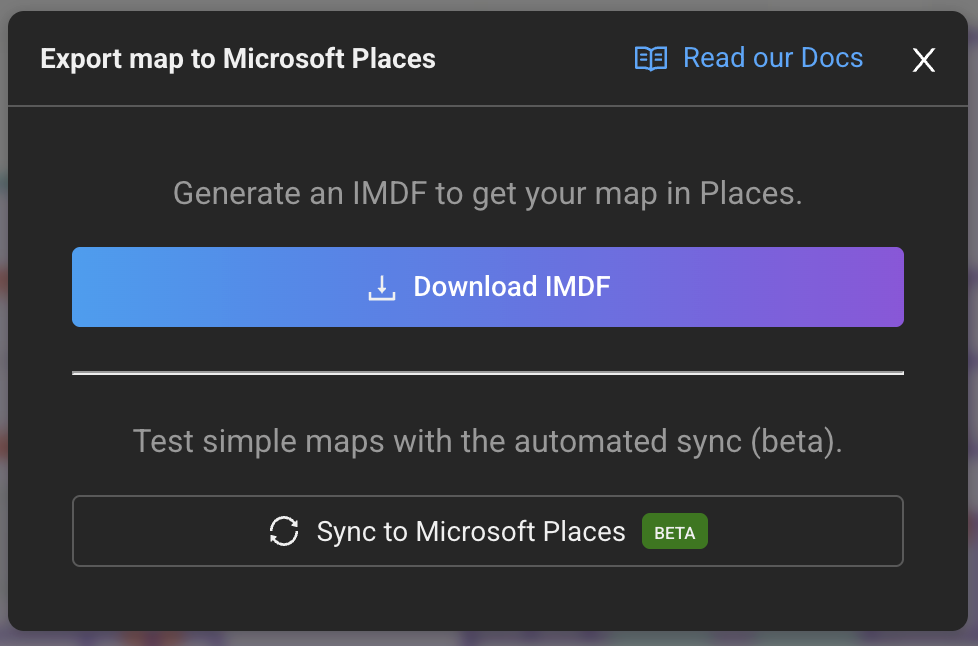
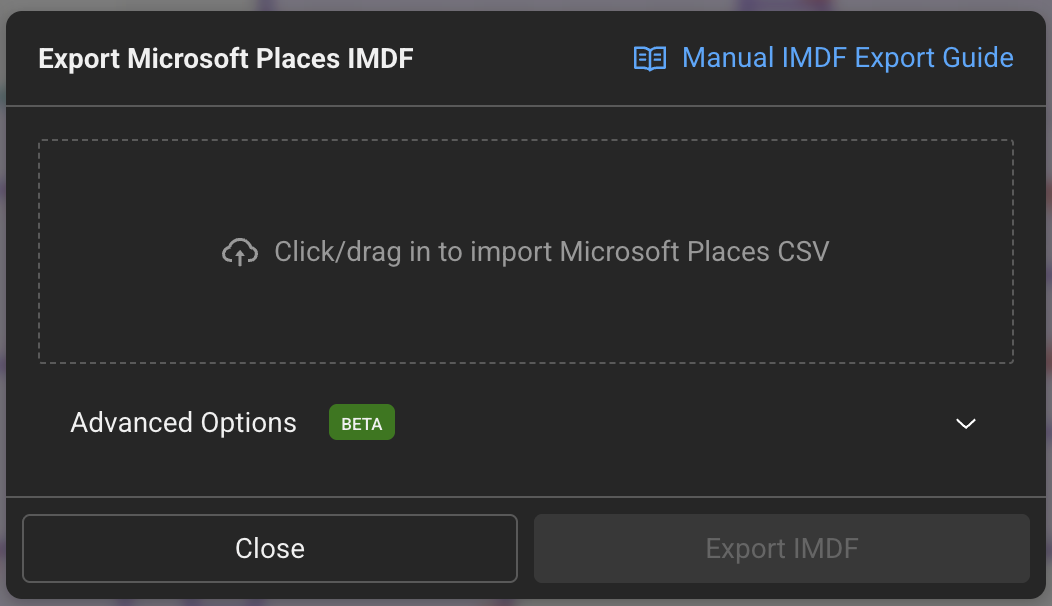
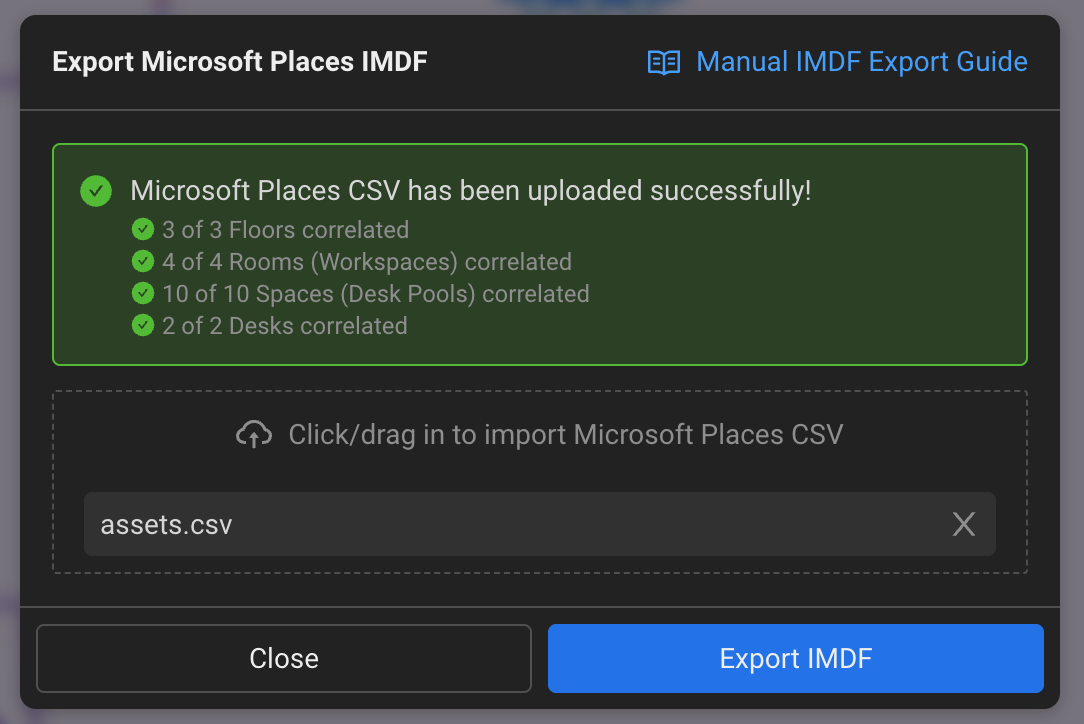
Upload the CSV file exported from Microsoft Places, then click Export IMDF to download the map export.
Upload the IMDF to Places (adjust the file path):
New-Map -BuildingId <YOUR_BUILDING_ID> -FilePath "C:\path\to\map\export\imdf_correlated.zip"
Update an Existing Map
To update a map, the existing map must be deleted first and a new map imported.
Connect and find the building ID:
Connect-MicrosoftPlaces
Get-PlaceV3 -Type Building | ft DisplayName,PlaceId
Remove the existing map:
Remove-Map -BuildingId <YOUR_BUILDING_ID>
Then follow the steps in Export and Upload the Map to upload the new version.